
Hello!
Today, I want to share my experience and walk you through the process of regrouting ceramic tiles in your bathroom.
When your bathroom tiles start to look old, you don’t necessarily have to embark on the difficult task of replacing them.
Regrouting can be a key element, giving your bathroom a fresh, youthful look as long as the tiles themselves remain in good condition.
It’s a process that can go above and beyond, making your entire tiling project look like new.
So let’s dive into it!
Tools for Regrouting Tile
Regrouting is a two-step process involving the removal of old grout and the application of new grout.
Here are the essential tools you’ll need for this project:
1. Oscillating Multitool
This versatile tool, whether corded or cordless, is equipped with a head that can accommodate various blades for cutting, sanding, polishing, grinding, and more.
By attaching a grout removal blade, it becomes your best friend for swiftly eliminating old grout.
Related: HOW TO DRILL INTO TILE: A COMPREHENSIVE GUIDE
2. Grout Blade
Specifically designed for grout removal, these blades often contain fine diamond chips that make quick work of pulverizing hardened grout.
3. Grout Removal Tool
This manual tool complements the oscillating multi-tool, helping you reach tight spaces between tiles.
It is useful for fine-tuning the grout removal process after using power tools.
4. Shop Vacuum
Essential for keeping your workspace clean.
It’s the only way to effectively remove pulverized tile grout from the seams.
5. Eye Protection and Dust Mask
These are crucial for your safety, especially since removing old grout can generate a lot of dust and debris.
6. Utility Knife
Helpful for various tasks during the regrouting process.
7. Buckets
For mixing and holding grout.
8. Margin Trowel
Used for mixing grout.
9. Grout Float
A rubber float for applying the new grout.
10. Grout Sponge
For cleaning up excess grout from the tiles.
11. Soft Cloths
Useful for the final cleanup.
Materials You’ll Need
- Powdered or premixed grout
- Grout pigment (if needed)
- Grout haze remover (optional)
- Plastic sheeting (if needed)
Now that we have our tools ready, let’s embark on this regrouting journey!

Related: A COMPREHENSIVE GUIDE ON HOW TO LAY TILE ON A PLYWOOD SUBFLOOR
Step 1: Remove the Grout
Begin by turning on your oscillating multitool and using it to remove the bulk of the old grout from between the tiles.
Hold the blade perpendicular to the tile surface and work patiently to avoid nicking or chipping the ceramic tiles.
Don’t worry about removing every bit of grout during this initial pass.
Pause frequently to vacuum away the dust and debris.
Step 2: Clean the Grout Lines
Once most of the grout is gone, make another pass with the oscillating tool to clean up the grout lines.
Angle the blade slightly to reach the edges of the tiles, but be cautious not to damage them.
The grout should crumble away quickly. If some areas prove stubborn, they’ll be addressed manually later.
Keep vacuuming as you go to maintain a tidy workspace.
Step 3: Remove Remaining Grout Manually
For any bits of grout that the power tool couldn’t tackle, use a carbide-tipped grout removal tool to carve them out.
Be gentle to avoid scratching the tile surfaces.
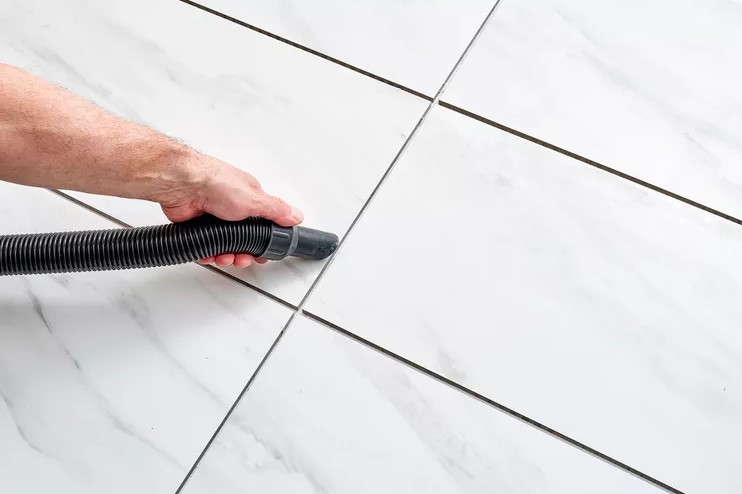
Step 4: Vacuum Thoroughly
Ensure that all dust and debris are removed from the seams.
The grout lines must be entirely clean and dry before proceeding to the next step.
Step 5: Mix the Grout
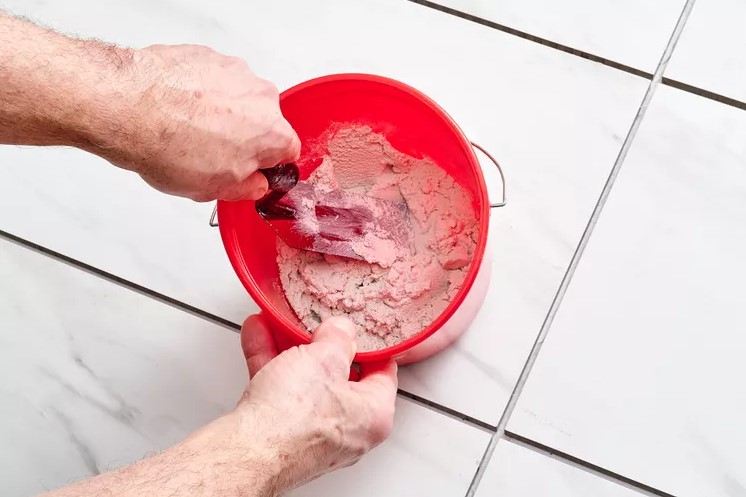
In a small bucket, mix the powdered grout using a margin trowel.
Begin by adding half of the recommended amount of water in a plastic bucket, then add half of the recommended amount of dry grout powder.
Mix thoroughly, then gradually add more water and grout powder until you have a full batch, enough to cover about 3 to 4 square feet.
The mixture should have a smooth, paste-like consistency that is just barely pourable.
Step 6: Fill the Grout Joints
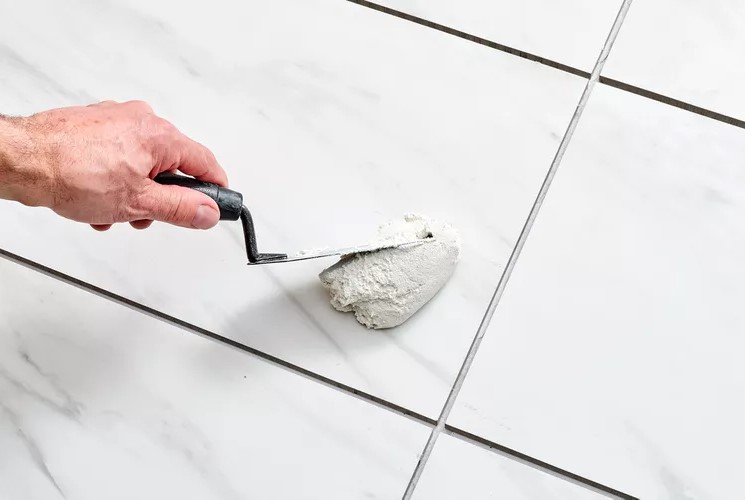
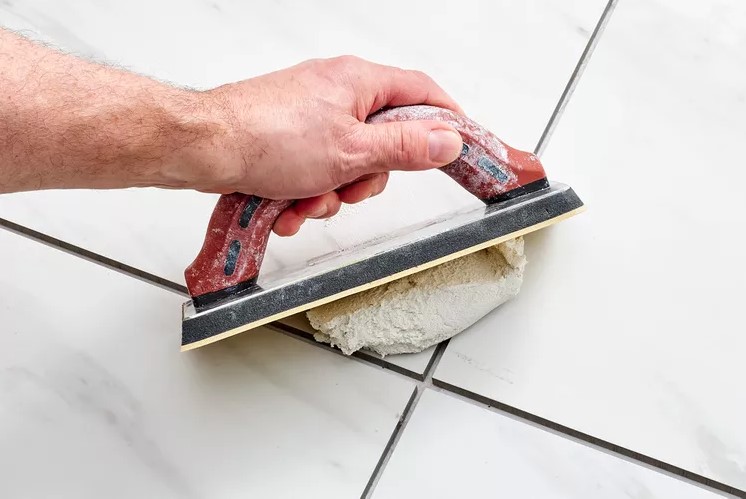
Scoop up a load of grout with a rubber grout float and smear it onto the tile surface.
Spread the grout over the joints, holding the float at an angle of about 60 degrees and pressing the grout fully into the joints.
Work in alternating directions to make sure the joints are completely filled.
Gather any excess grout and move it to the next area of tile or reload the tile as needed.
Repeat the same process until all the joints are filled.
Step 7: Sponge the Joints and Tiles
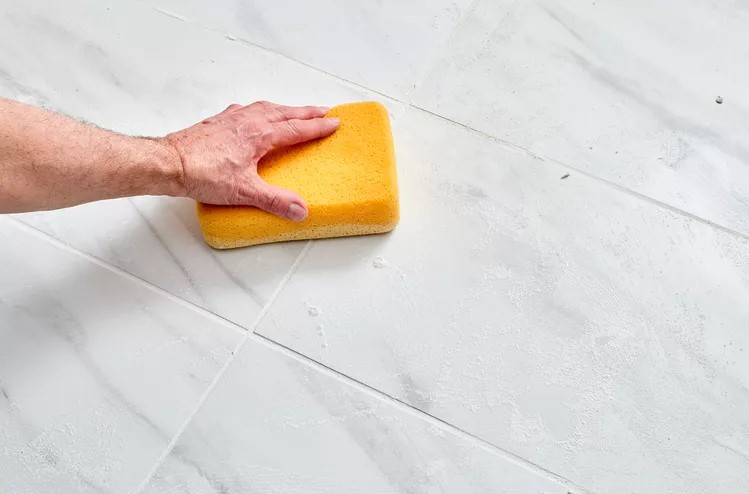
Once all grout lines are filled and tooled, use a moistened sponge to remove excess grout.
Make sure the sponge is barely wet—too much water will pull grout out of the seams.
Lightly stroke the sponge across the tile surface without pressing too hard.
Step 8: Remove the Grout Haze
Once the grout has dried completely or as directed, a faint haze will still be present on the surface of the tiles.
Use a soft cloth to buff the surfaces of the tile and remove any remaining haze.
If you wish, you can use a haze-removing product to polish the tiles.
Step 9: Seal the Grout (if needed)
Standard grout that comes in powdered form should be sealed for stain-resistance after the grout has fully cured.
Many types of premixed grout do not need to be sealed, so check the product label for guidance.
Related: A CLOSER LOOK AT TERRACOTTA TILES: TYPES AND APPLICATIONS
10 Tips for Regrouting Tile
- It’s fine to use tools other than a manual grout removal tool. A dull screwdriver or a utility knife with a dull blade can be used.
- Tile grout is available both as a dry powder that must be mixed with water or as a premixed semi-liquid paste in tubs of various sizes. For small applications, it’s usually easier to use premixed grout.
- Unsanded grouts are used for grout joints 1/4-inch wide or less, while sanded grouts work best for grout lines wider than 1/4-inch.
- Some grouts may need to sit (slake) for a short period before applying.
- Premixed and powdered grouts are available in a small range of colors, but for more unique colors, you can blend in grout pigment during mixing.
- The grout float should be moved diagonally across the joint lines to ensure a uniform fill.
- If tiles have a rounded or beveled edge, the joints may need to be tooled. Tooling is the process of removing the upper layer of grout, leaving a thinner professional-looking joint.
- Drag the round tip of a pencil eraser along the joint when the grout has slightly dried to tool it.
- Sponging the tile is slow. Be sure to frequently clean out your sponge and wipe it across the tile surface, moving diagonally across the joints, until all excess grout is gone.
- Don’t worry too much about cleaning the surfaces of the tile completely at this stage. You’ll have another opportunity later to clean off any remaining grout with the haze remover.
Last words
That’s it!
By following these steps and tips, you can successfully regout your ceramic tiles, adding newness to your bathroom without the hassle of replacing the entire tile.
It’s a fun DIY project that can make your bathroom look new again.
Disclosure: As an Amazon Associate, I earn from qualifying purchases.
Related: SAVE MONEY AND TILES: THE DIY APPROACH TO FIXING CRACKED TILES