Tiles can significantly enhance the value and aesthetics of your home, but replacing them can be expensive and labor-intensive.
For many do-it-yourselfers, tile-setting can be a challenging skill to master.
Additionally, removing old tiles can be a messy and environmentally unfriendly process.
Painting tile offers a faster, cost-effective, and cleaner alternative to full tile replacement.
While painted tile may not last as long as new tile, it can breathe new life into your existing tiles, restoring them to an almost-new appearance.
Before You Begin
Before embarking on a tile painting project, it’s crucial to understand the main types of primer and tile paint to choose the right products for your project.
Here are some key considerations:
Bonding Primer
When painting tile, select a primer with “bonding” in its name.
Avoid using concrete, masonry, or metal primers.
Bonding primers contain special resins that create a strong adhesive bond between the tile and the paint.
This helps prevent issues like peeling, flaking, and chipping.
Tile Paint
Tile paint comes in various forms, and it’s essential to choose the one that suits your needs:
- One-Part Epoxy Paint: These are user-friendly as they require no multiple coats. One-part epoxies are air-cured products. Some are available in spray cans.
- Two-Part Epoxy Paint: This type of paint involves mixing two components before application. It’s more readily available, offering more choices.
- Two-Process Paint: This type requires two separate steps—an initial bonding agent application followed by the top finish coat. Two-process tile paint is durable and long-lasting.
Pros and Cons of Painting Tiles
Pros:
- Avoids the need for tile removal.
- Provides an opportunity to fix minor tile problems.
- Less expensive than tile replacement.
Cons:
- Paint may peel over time.
- Covers the grout, which might not be desired.
- Requires extensive preparation work.
Safety Considerations
Ventilate the work area and wear appropriate breathing protection when using bonding primer and tile paint.
What You’ll Need
Equipment / Tools
- Paint roller and cover
- Paint tray and liner
- Paintbrushes
- Tack cloth
- Orbital sander
- Sandpaper
- Putty knife
- Clean bucket
- Scouring pad sponge
- Latex or latex-substitute gloves
- Eye, hearing, and breathing protection
Materials
- Tile paint
- Bonding primer
- Polyurethane clear coat
- TSP or TSP-substitute cleaner
- Paintable caulk
- Exterior-grade waterproof spackling paste
- Tile grout
- Painter’s tape
- Sheet plastic
Step-by-Step Instructions
1. Clean the Tile
- Fill a bucket with warm water and add TSP (Trisodium Phosphate) to create an effective cleaning solution.
- While wearing gloves, thoroughly wipe down the tile to remove dirt and grime. Start from the top and work downwards.
- Rinse the tile with clean water and allow it to dry.
What Is TSP? TSP is an odorless dry powder that, when mixed with water, becomes an effective cleaner for cutting through grease and grime. In some areas, TSP may be banned, so you should look for phosphate-free substitutes if necessary.
2. Repair the Tile
- For thin cracks and small chips on the tile surface, apply caulk while wearing gloves. Wipe it level with your finger.
- For larger defects, use exterior-grade waterproof spackling paste. Apply a small amount and use a putty knife to level it with the tile surface.
3. Repair the Grout
Since painting tile includes the grout, ensure it’s in good condition.
For small spot repairs, use tile grout sold in tubes.
Apply it with a gloved finger and wipe away excess.
For more extensive grout damage, remove and replace it with new grout.
4. Sand the Tile
- While wearing eye, hearing, and breathing protection, use an orbital sander equipped with sandpaper in the #100 to #150 grit range.
- Avoid sanding down to the tile body (below the glazing). Instead, scuff up the glaze to create a matte finish that provides better adhesion for paint.
Tip: Liquid deglosser or liquid sandpaper is effective on painted surfaces but won’t degloss tile. Physical sanding is still necessary.
5. Clean the Tile With Tack Cloth
- After sanding, clean the tile with water.
- Once the tile is dry, use a tack cloth to clean it again. Apply light pressure to prevent embedding beeswax on the tile surface, which would require additional sanding.
6. Protect Non-Paintable Areas
- Use painter’s tape and sheet plastic to protect areas that you do not want to paint.
7. Apply the Bonding Primer
- Pour a small amount of bonding primer into a lined paint tray.
- Dip the paint roller into the primer, rolling off excess in the tray until the roller is nearly dry.
- Carefully apply a thin coat of primer to the tile, avoiding excessive pressure to prevent drips.
- Once the primer is dry, apply a second thin coat.
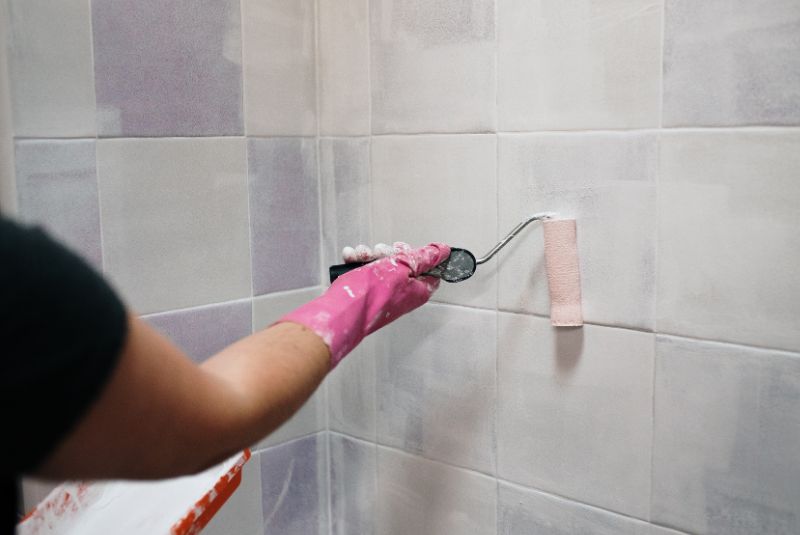
8. Paint the Tile
- Place a new liner in the paint tray.
- Add only a small amount of paint to the tray reservoir, then roll out the roller until it is almost dry.
- Roll the tile surface with one coat of paint. Fill in and touch up the edges with a paintbrush.
Tip: Avoid overloading your roller or brush with paint, as too much paint will drip and could leave unsightly marks on your final surface.
9. Let the Paint Cure
- Allow the paint to cure completely, then apply a second coat. If two coats are not sufficient, you can add a third coat after the second coat has dried.
10. Apply a Sealer
Once the paint has fully cured, apply two coats of polyurethane sealer to protect the color coats and ensure long-lasting results.
5 Tips for Painting Tile
- Select the Right Surface: Painting tile works best on vertical surfaces, such as dry or low-moisture walls or backsplashes, and low-impact horizontal surfaces like certain tile countertops.
- Thoroughly Clean the Tile: Tiles can accumulate years of dirt and grime, so it’s crucial to spend time thoroughly cleaning all areas of the tile, especially the grout seams.
- Scuff the Tile: Glossy tile surfaces may repel paint, so sanding the tile to create a matte finish (tooth) helps the paint adhere better and last longer. While tile won’t have the porosity of wood, scuffing exposes some of the pores beneath the glazing.
- Use Primer: Unlike some other surfaces, tile requires primer to ensure good paint adhesion. Always opt for a bonding primer to create a strong bond between the tile and the paint.
- Choose Tile Paint: Avoid using acrylic-latex interior or exterior house paints, as they are not suitable for painting tile. For superior results and maximum durability, use epoxy paint or paint specifically designated as tile paint.
When to Call a Professional
Professional painters typically deal more with walls and ceilings than kitchen or bathroom tile counters or wall surrounds.
However, companies specializing in refinishing bathtubs often include tile coating or painting in their list of services.
If you’re unsure about your painting skills or have extensive tile surfaces to paint, consider consulting with a professional to ensure the best results.
In conclusion, painting tile can be a cost-effective and efficient way to refresh the look of your tiles without the need for extensive replacement.
By following these step-by-step instructions and safety precautions, you can achieve a beautiful, long-lasting finish that revitalizes your tile surfaces.