In today’s article, we will be providing you with a comprehensive guide on how to successfully install a kitchen sink sprayer.
With a focus on practicality and efficiency, we will walk you through the necessary steps and tools required for this task. Whether you are a skilled DIY enthusiast or a beginner looking to tackle a new project, our detailed instructions will enable you to add this convenient feature to your kitchen sink with ease.
So without further ado, let’s get started on this practical and rewarding installation process.
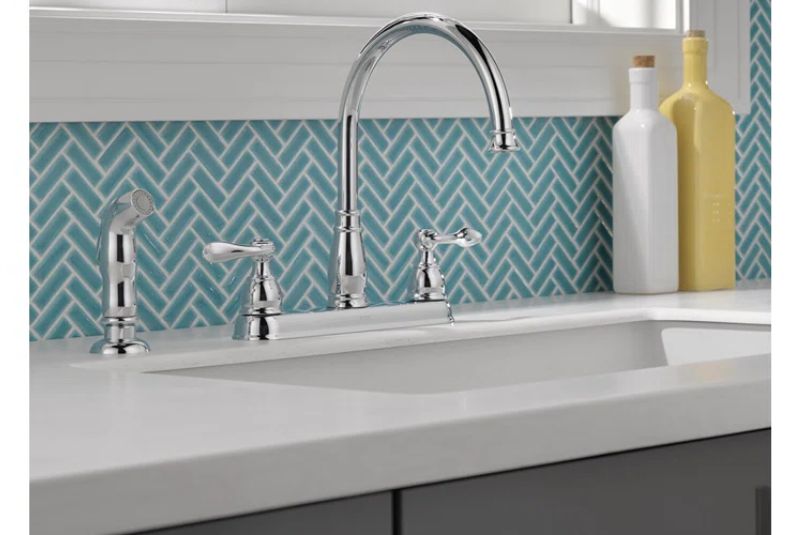
Choosing the Right Kitchen Sink Sprayer
When choosing a kitchen sink sprayer, it is important to consider the type of sprayer that will best suit your needs.
There are different types available, including pull-down sprayers, side sprayers, and commercial-style sprayers. Each type offers its own advantages and disadvantages, so it is essential to assess your requirements and preferences before making a decision.
Pull-down sprayers are popular due to their versatility and flexibility.
They feature a hose that can be extended and maneuvered to reach different areas of the sink easily. These sprayers often have multiple spray modes, allowing you to switch between a steady stream and a more powerful spray when needed.
Side sprayers, on the other hand, are installed alongside the main faucet.
They are usually connected to a separate hose and provide an additional water source for tasks such as rinsing dishes or filling pots. Side sprayers are an excellent choice if you require a separate spray function without sacrificing the convenience of a pull-down sprayer.
Commercial-style sprayers are designed to replicate the functionality of professional kitchen faucets.
They typically feature a flexible hose with a high-pressure spray function that is perfect for heavy-duty cleaning tasks. While commercial-style sprayers can be more expensive, they are highly durable and suitable for kitchens that experience heavy use.
Consider your sink’s compatibility when selecting a sprayer.
The sink’s design and configuration should align with the type of sprayer you choose. For instance, some sinks have pre-drilled holes specifically for side sprayers, while others are designed for pull-down sprayers.
Ensure that the sprayer you choose is compatible with your sink to ensure a proper and secure installation.
Additionally, look for additional features that may enhance your overall kitchen experience. Some sprayers offer features such as a magnetic docking system, which keeps the sprayer securely in place when not in use.
Others may have touchless activation, allowing you to turn the sprayer on and off by simply waving your hand.
Consider these options and determine which ones are most important to you before making a final decision on your kitchen sink sprayer.
Gathering the Necessary Tools and Supplies
Before beginning the installation process, it is crucial to gather all the necessary tools and supplies to ensure a smooth and efficient installation.
Here is a list of the common tools and supplies you will need:
- Adjustable wrench
- Pipe tape
- Bucket or container
- Towels or rags
- Screwdriver
- Safety glasses
- New sprayer hose
- Sprayer head
- Sprayer holder
- Mounting hardware (screws, anchors)
It is important to shut off the water supply before proceeding with any installation or removal tasks. Locate the main water shut-off valve and turn it off to prevent any potential water leaks or damage.
Once the water supply is shut off, prepare your workspace by clearing the area around the sink and removing any necessary items that may obstruct the installation process.
Ensure that you have all the required tools and supplies within reach.
Having everything organized and readily available will make the installation process more efficient and minimize the chances of misplacing important components.
Take the time to gather all the necessary tools and supplies and place them in a convenient location before proceeding with the installation.
Removing the Existing Faucet
Before installing the new sprayer, it is necessary to remove the existing faucet. This involves disconnecting the water lines and removing the nuts securing the faucet in place.
Here are the steps to remove the existing faucet:
- To begin, turn off the water supply by locating the main shut-off valve and turning it off to prevent any water flow. This step is crucial to avoid any potential water leaks or accidents during the removal process.
- Next, disconnect the water lines by loosening the nuts that connect them to the faucet. Use an adjustable wrench to loosen the nuts and carefully remove the water lines. Keep a bucket or container nearby to catch any water that may come out during this step.
- Once the water lines are disconnected, remove the nuts securing the faucet to the sink. These nuts are typically located underneath the sink and may require the use of a screwdriver or adjustable wrench to loosen and remove. Take care when removing the nuts to avoid damaging the sink or surrounding area.
With the existing faucet removed, you are ready to proceed with installing the new kitchen sink sprayer.
Installing the New Sprayer Hose
Installing the new sprayer hose is a crucial step in the installation process. This involves preparing the sprayer hose, attaching it to the faucet, and connecting the other end of the hose appropriately.
Follow these steps for a successful installation of the new sprayer hose:
- To prepare the sprayer hose, ensure that it is the correct length and in good condition. Remove any protective caps or packaging from the hose and inspect it for any damage or defects. If the hose is not the correct length, you may need to trim it to fit your specific sink configuration.
- Attach the sprayer hose to the faucet by following the manufacturer’s instructions. Typically, this involves screwing or twisting the hose onto the designated connection point on the faucet. Ensure a secure and tight connection to prevent any potential leaks.
- Once the sprayer hose is attached to the faucet, connect the other end of the hose to the designated connection point on the sink or countertop. This connection point is typically located near the main water supply lines. Again, follow the manufacturer’s instructions for your specific sprayer model to ensure a proper and secure connection.
With the new sprayer hose successfully installed, you can proceed to the next step of mounting the sprayer holder.
Mounting the Sprayer Holder
Mounting the sprayer holder involves finding a suitable location for the holder, marking the mounting holes, and installing the holder securely.
Follow these steps to mount the sprayer holder:
- Find a suitable location for the sprayer holder near the sink. This location should be within easy reach and provide sufficient support for the sprayer head.
- Once you have determined the ideal location, mark the mounting holes on the wall or cabinet. Use a pencil or marker to make small dots where the holes should be drilled. Ensure that the markings are level and aligned to create a professional and aesthetically pleasing installation.
- With the mounting holes marked, use an appropriate tool, such as a drill, to create the holes. Be mindful of the surface you are drilling into and use caution to avoid any damage or overdrilling.
- Install the sprayer holder by aligning the mounting holes with the holes in the wall or cabinet. Insert the appropriate screws or anchors provided with the sprayer holder and tighten them securely. Ensure that the holder is level and does not wobble or move when the sprayer is in use.
With the sprayer holder securely mounted, you can proceed to connecting the sprayer hose to the supply line.
Connecting the Sprayer Hose to the Supply Line
Connecting the sprayer hose to the supply line is a crucial step in the installation process. This ensures that the sprayer receives water flow and allows for its proper functionality.
Follow these steps to connect the sprayer hose to the supply line:
- Locate the supply line, which is typically located underneath the sink or inside a cabinet. The supply line is responsible for delivering water to the faucet and other components, such as the sprayer hose.
- Attach the sprayer hose to the supply line by following the manufacturer’s instructions. This typically involves screwing or twisting the hose onto the designated connection point on the supply line. Ensure a secure and tight connection to prevent any potential leaks.
- Once the sprayer hose is attached to the supply line, carefully turn on the water supply at the main shut-off valve. This will allow water to flow through the supply line and reach the sprayer hose. Keep a close eye on the connection points for any signs of leaks or drips. If any leaks are detected, tighten the connections as necessary.
- Test the sprayer functionality by turning on the water supply and activating the sprayer. Ensure that the sprayer head produces a steady and consistent stream of water. Verify that there are no leaks or issues with water flow. If any problems are detected, double-check the connections and adjust as necessary.
With the sprayer hose successfully connected to the supply line, you can now proceed to attaching the sprayer head.
Attaching the Sprayer Head
Attaching the sprayer head is the final step in the installation process. This involves removing the protective cap from the sprayer head, attaching it to the sprayer hose, and ensuring proper connection and function.
Follow these steps to attach the sprayer head:
- Remove the protective cap from the sprayer head by twisting or unscrewing it. Most sprayer heads come with a protective cap to prevent any damage during transportation and installation. Set the cap aside for future use or disposal.
- Attach the sprayer head to the sprayer hose by following the manufacturer’s instructions. This typically involves screwing or twisting the head onto the designated connection point on the hose. Ensure a secure and tight connection to prevent any potential leaks.
- Once the sprayer head is attached, test its connection and functionality. Ensure that the sprayer head remains securely in place and does not leak or malfunction during use. Activate the sprayer and check for a steady and consistent stream of water flow. Adjust any connections as necessary to ensure proper function.
With the sprayer head successfully attached, you can proceed to testing the sprayer.
Testing the Sprayer
Testing the sprayer is an essential step to ensure its proper installation and functionality. This involves turning on the water supply, checking for any leaks, and testing the sprayer’s overall functionality.
Follow these steps to test the sprayer:
- Turn on the water supply at the main shut-off valve to allow water flow to the sprayer. Keep a close eye on the connections and check for any signs of leaks or drips. Tighten any loose connections if necessary to eliminate any leaks.
- Once the water supply is turned on, activate the sprayer and test its functionality. Ensure that the sprayer produces a steady and consistent stream of water. Check the different spray modes, if applicable, to ensure that they function as intended. Pay attention to any unusual noises or malfunctions that may indicate a problem with the installation.
- Test the sprayer in different scenarios, such as rinsing dishes or filling pots, to ensure its versatility and effectiveness. Pay attention to the sprayer’s range and adjustability to ensure that it meets your specific needs and preferences.
If any issues or problems are detected during the testing process, double-check the installation steps and connections. Make any necessary adjustments or repairs to ensure the sprayer’s proper functionality.
Cleaning Up and Finalizing
After testing and ensuring the sprayer’s functionality, it is essential to clean up the installation area and finalize the project.
Follow these steps to complete the installation process:
- Tighten any loose connections, such as faucet or hose connections, to ensure that there are no potential leaks or drips. Use an adjustable wrench or suitable tool to provide a secure and tight fit.
- Remove any debris or packaging materials from the installation area. Dispose of any waste materials properly and clean the surrounding area to provide a clean and tidy finish.
- Restore the water supply by turning on the main shut-off valve. Allow water to flow through the system and check for any final signs of leaks or issues. If any leaks are detected, double-check the connections and tighten them as necessary.
With the installation process complete, take a moment to admire your newly installed kitchen sink sprayer.
Enjoy the convenience and functionality it brings to your daily kitchen tasks.
Conclusion
Choosing and installing the right kitchen sink sprayer requires careful consideration and attention to detail.
By considering the type of sprayer, checking for compatibility with your sink, and looking for additional features, you can select a sprayer that best suits your needs.
Gathering the necessary tools and supplies, removing the existing faucet, installing the new sprayer hose, mounting the sprayer holder, connecting the sprayer hose to the supply line, attaching the sprayer head, testing the sprayer, cleaning up, and finalizing the installation are the crucial steps to ensure a successful installation.
Following these steps will help you achieve a functional and efficient kitchen sink sprayer that enhances your overall kitchen experience.